We are extremely thankful to our readers for the overwhelmingly positive response to our first teardown of the QiKU Q Terra. To follow that up, we are now bring you our second teardown with the Xiaomi Redmi Note 3.
httpv://www.youtube.com/watch?v=zD-JdBVPL0o
The specifications of the Xiaomi Redmi Note 3 are as follows:
- 5.5-inch (1920 x 1080 pixels) Full HD IPS display, 178-degree viewing angle
- Octa-Core MediaTek Helio X10 (MT6795) processor with PowerVR G6200 GPU
- 2GB RAM with 16GB storage, 3GB RAM with 32GB storage
- MIUI 7 based on Android Lollipop
- Dual SIM
- 13MP rear camera with PDAF, dual-tone LED Flash, f/2.2 aperture, 1080p video recording, 120fps slow-motion
- 5MP front-facing camera, f/2.0 aperture, 1080p video recording
- Dimensions: 150x76x8.65 mm; Weight: 164g
- 4G LTE, Wi-Fi 802.11 ac/b/g/n ( 2.4 / 5GHz), Bluetooth 4.0, GPS + GLONASS
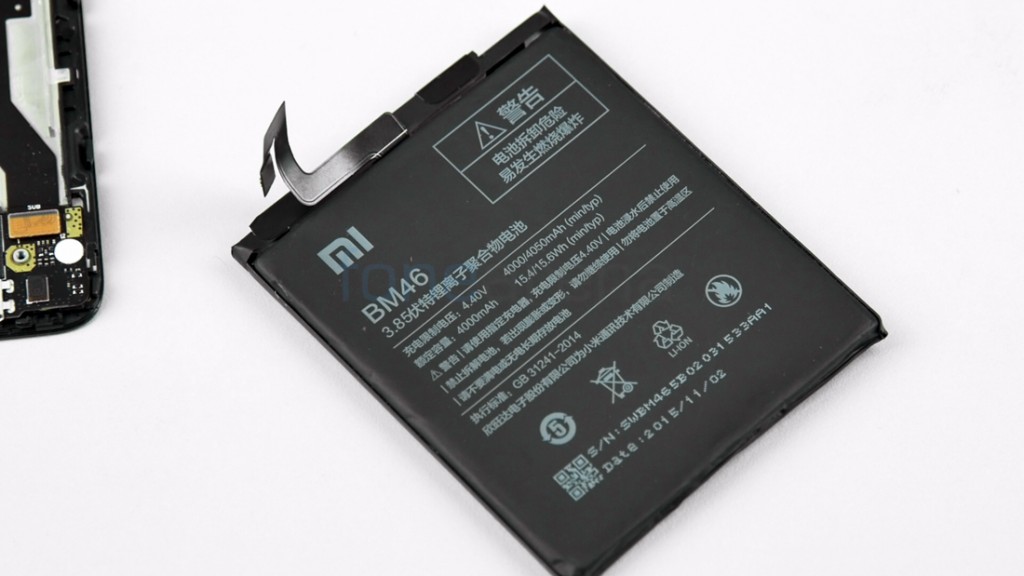
- 4000mAh battery with fast charging

The Redmi Note 3 is a mid ranger smartphone with a fingerprint sensor. We decided to do a teardown of the device to show you the internals and the components in detail.

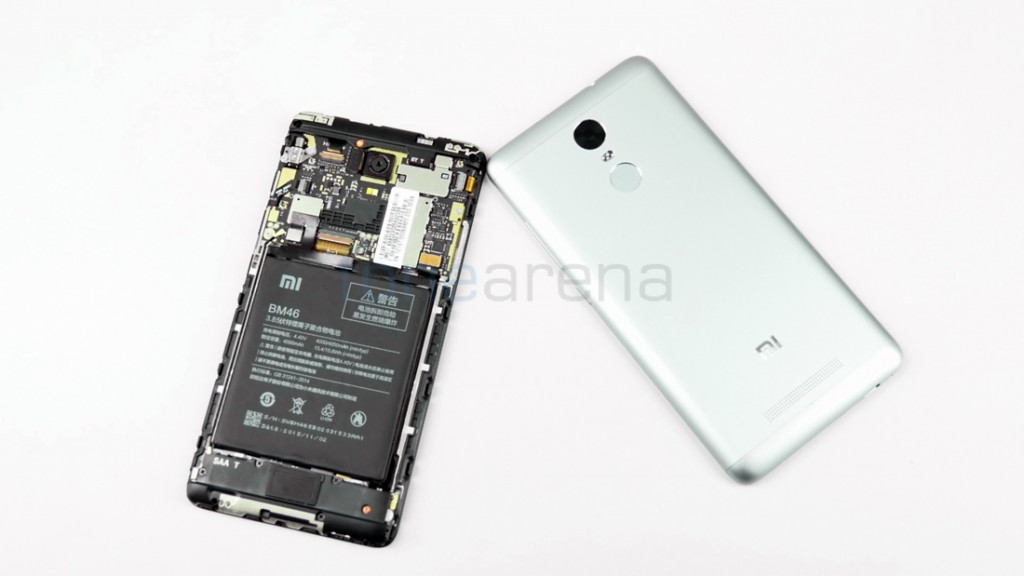
The Redmi Note 3 is the first device to feature a unibody in the Redmi Note lineup. Like with the QiKU Q Terra, we started off with the back of the device. We used the gap near the microUSB slot to pry open the back.
Although it looks very much like the Q Terra, the plastic portions at the top and bottom of the Note 3 at the back are actually part of a single back cover. Upon opening the back cover, we find a ribbon connector for the fingerprint sensor to the logic board.
The fingerprint sensor assembly has been taped to the back cover to avoid it moving out of place or rattling. The next step is to remove the 5 screws that hold the speaker unit in place. Before moving further, we also disconnected the battery to prevent any short circuit or malfunctioning.
Since the battery has been glued down, we used a heater to unglue it and take it off the phone.The 4,000 mAH battery is built-in to the phone and isn’t user replaceable like the previous Redmi Note smartphones.
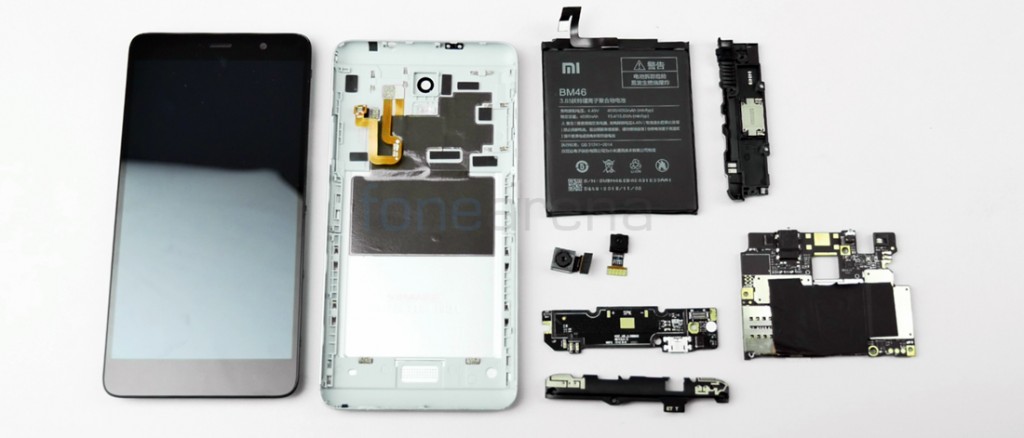
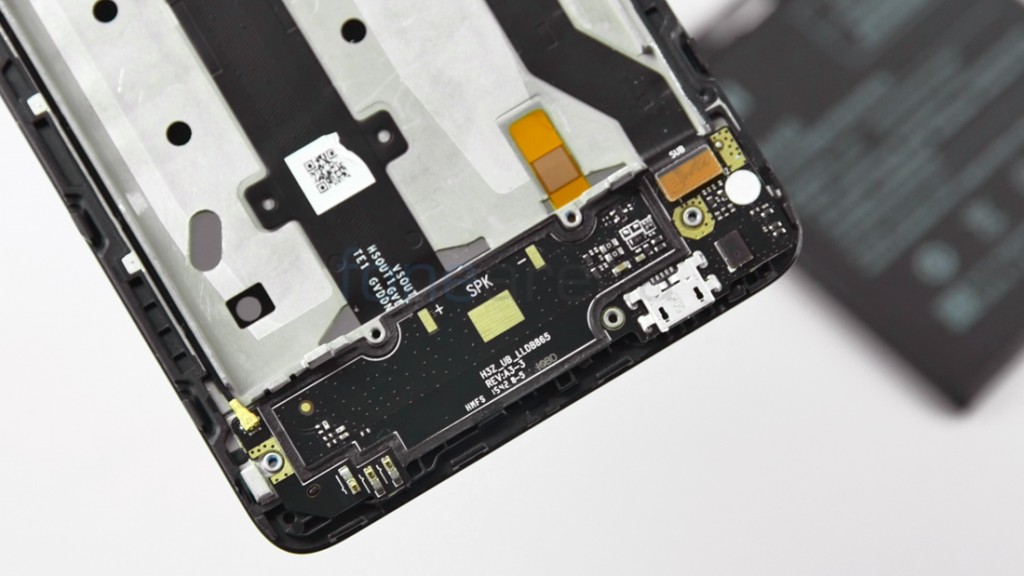
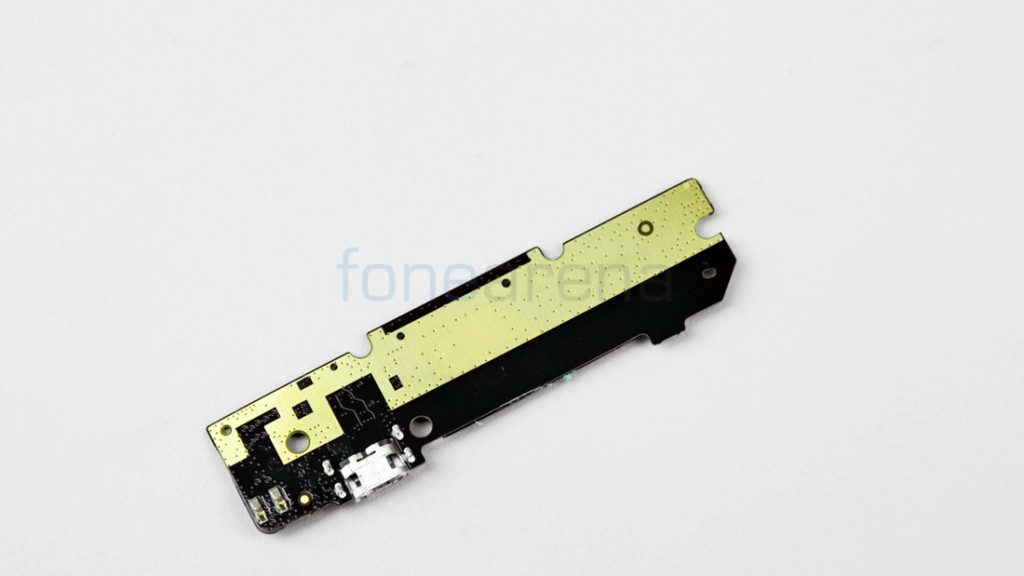
We then removed the speaker unit as well as the ribbon cable connecting the microUSB port and speaker to the logic board. The microUSB port is glued to the display unit.
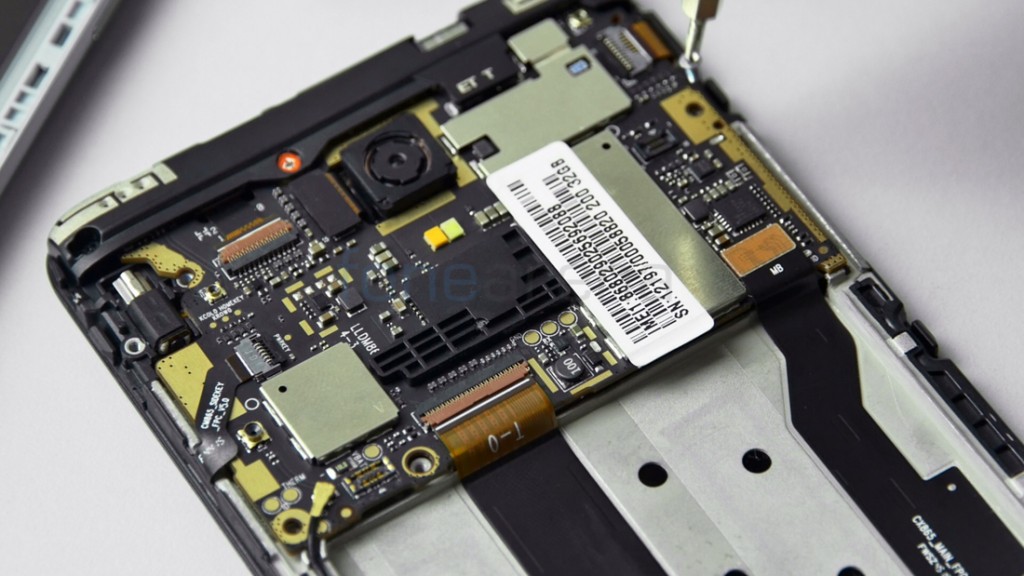
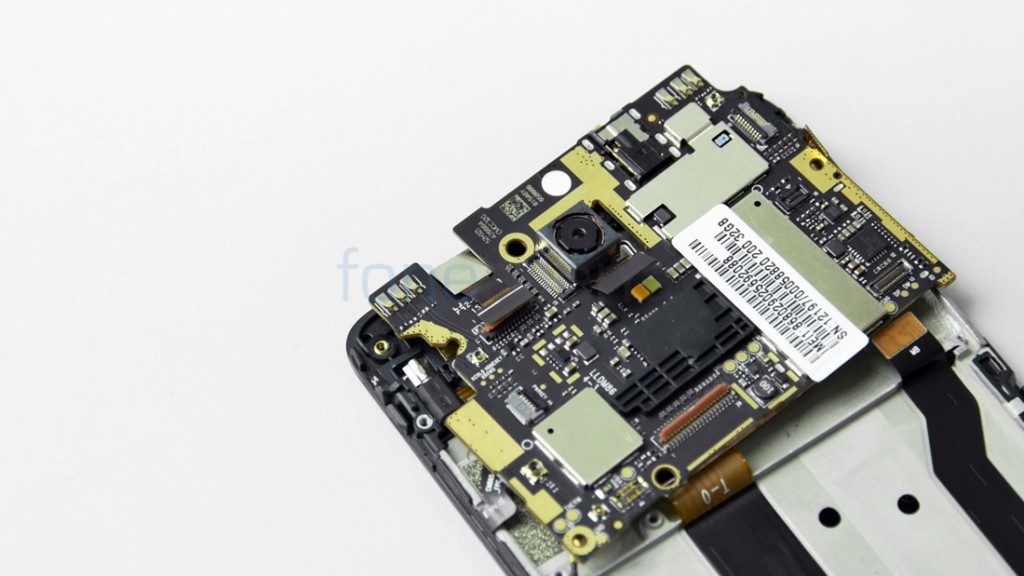
We then proceeded to remove the logic board by undoing the lock type ribbon connectors and removing all the screws that hold it in place. This will also allow you to remove the top portion.
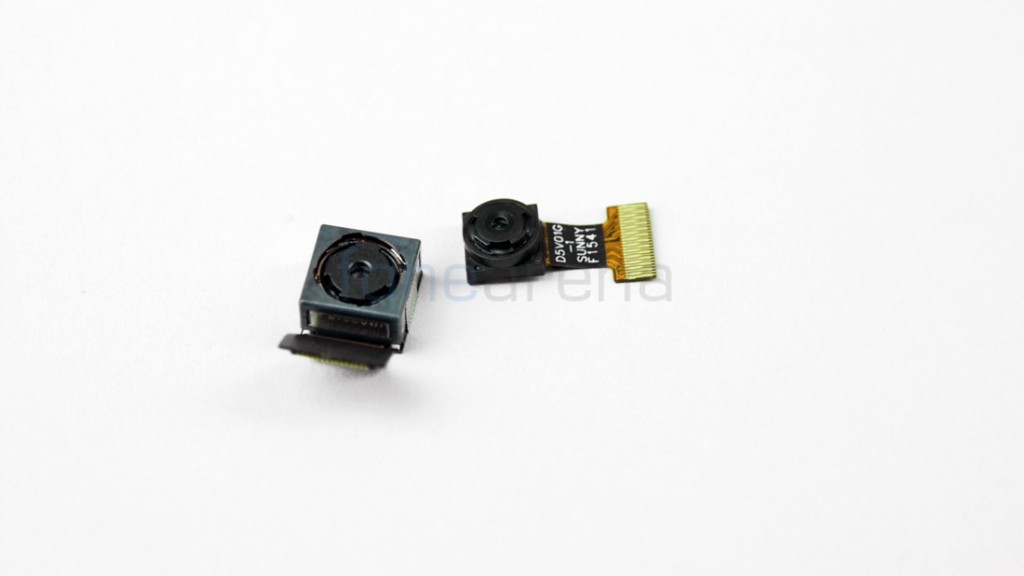
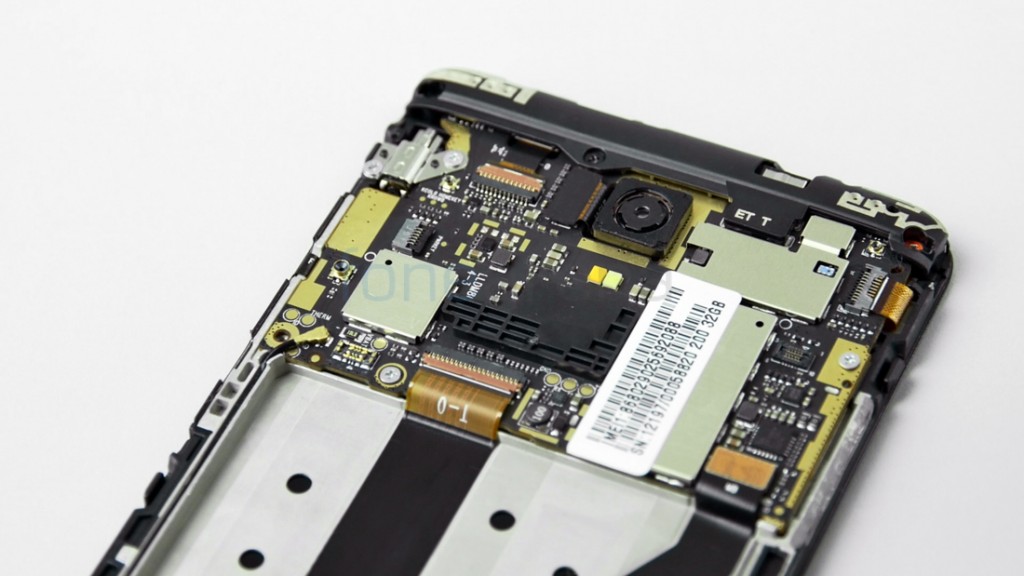
You can also remove the back cover by removing the ribbon connector. You can also remove the front facing camera module along with it. Above is the 13 Megapixel primary camera with PDAF, f2.2 aperture and dual-tone LED flash and the front camera is a 5 Megapixel unit with f2.0 aperture.
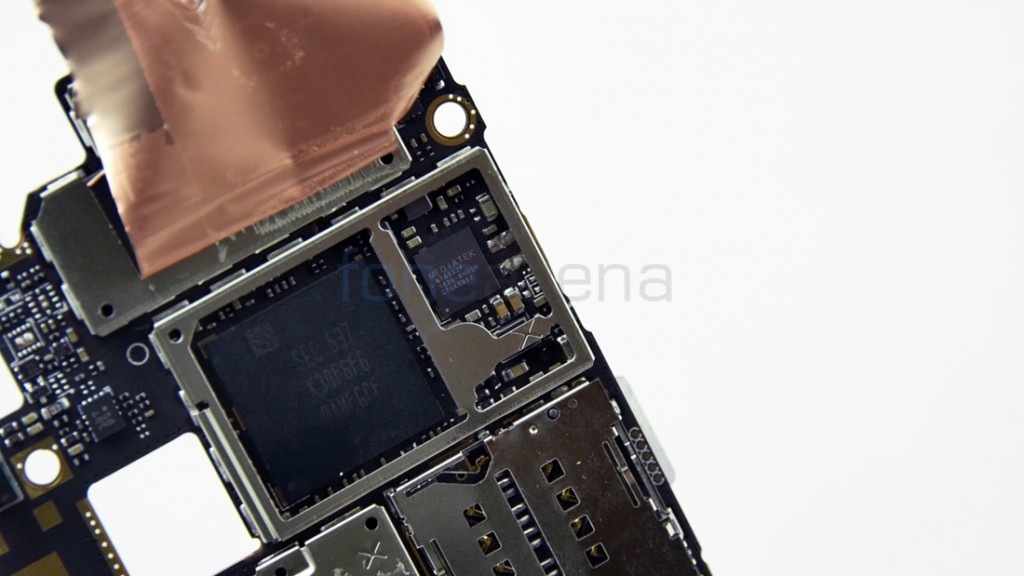
Finally, we need to uncover the metal shielding to see the MediaTek MT6795 Helio X10 octa-core SoC, PowerVR G6200 GPU and MediaTek power controller.