Much has been said about the Nokia Lumia 1020 and its amazing camera prowess, but what made it fun was using the camera interface. Yes, the interface, also known as the Nokia Pro Cam, provided the much needed control and versatility for the robust camera hardware that Nokia packed in the Lumia 1020. But the other PureView devices are no exception either and Nokia made sure that 920, 925 and 928 users get the Pro Cam, and eventually they did. We immediately installed it onto the Nokia Lumia 925 and found it to work really well, just like how we found it on the Lumia 1020 earlier. So, we made a video to show you how awesome it is, take a look at the video walk through below and go past the break for a detailed walk through in images and text with bonus samples –
httpv://www.youtube.com/watch?v=tCw1v1gnVrY
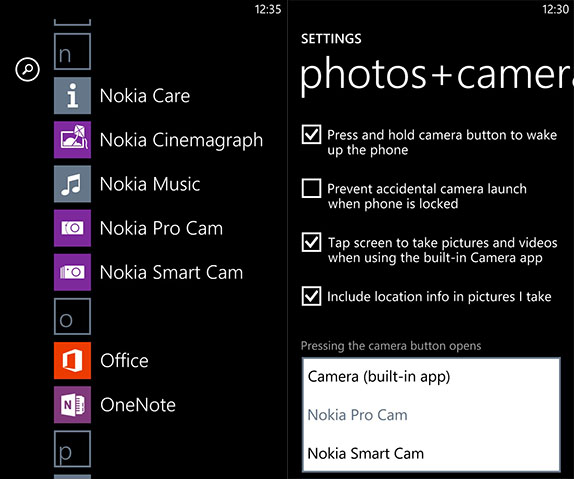
The Nokia Pro Cam is very feature rich, and to capitalize on all the features, there are options inside the OS’ Camera settings that let you map the shutter key to launch the Nokia Pro Cam app. Lets dive in to the interface then.

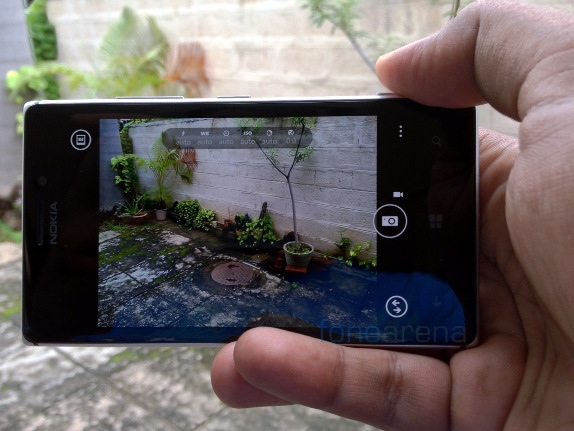
The viewfinder of the Pro Cam app is slightly reminiscent of the 808 PureView’s camera app. Over at the extreme right, you have the shutter buttons for photo and video, which is a switch in itself. You can change between the stills and video modes with just a downward and an upward swipe. Tapping on the shutter takes a photo or starts recording a video depending on the mode. Tapping anywhere on the viewfinder focuses the camera, and this depends on the point you were tapping. So, we finally have a decently working tap to focus functionality on Windows Phone.
But focusing can be achieved using a half press of the hardware button or even by just pressing the software shutter button. While it is either tap to focus or the other two options in stills, Video mode has continuous AF as well as tap to focus before recording the video. Zoom is facilitated by the slide up/down gesture that was made popular with the 808 PureView, but the standard pinch to zoom gesture works too. It was also really interesting to note that 1.8x lossless zoom is available for the Lumia 925 in the 1080p mode and the double of that in the 720p mode.
Below the shutter key is the lens switcher, which, in Windows Phone terms, is to directly jump into another app’s viewfinder from any camera. Above the shutter key is the app bar with several useful options. We’ll get back to that after going through the other important UI elements. Over at the top of the camera UI is a very interesting bar with several manual options.
The first icon(left to right) on the Pro Cam bar is for the Flash light, which is of the Dual LED nature on the Lumia 925. Eventhough, it is just Dual LED, there are options to either turn it on/off or just use it as a focus light assist. It was weird to see an option to turn the focus light off individually because that’s not a necessity on the Lumia 925, but is needed for the Lumia 1020.
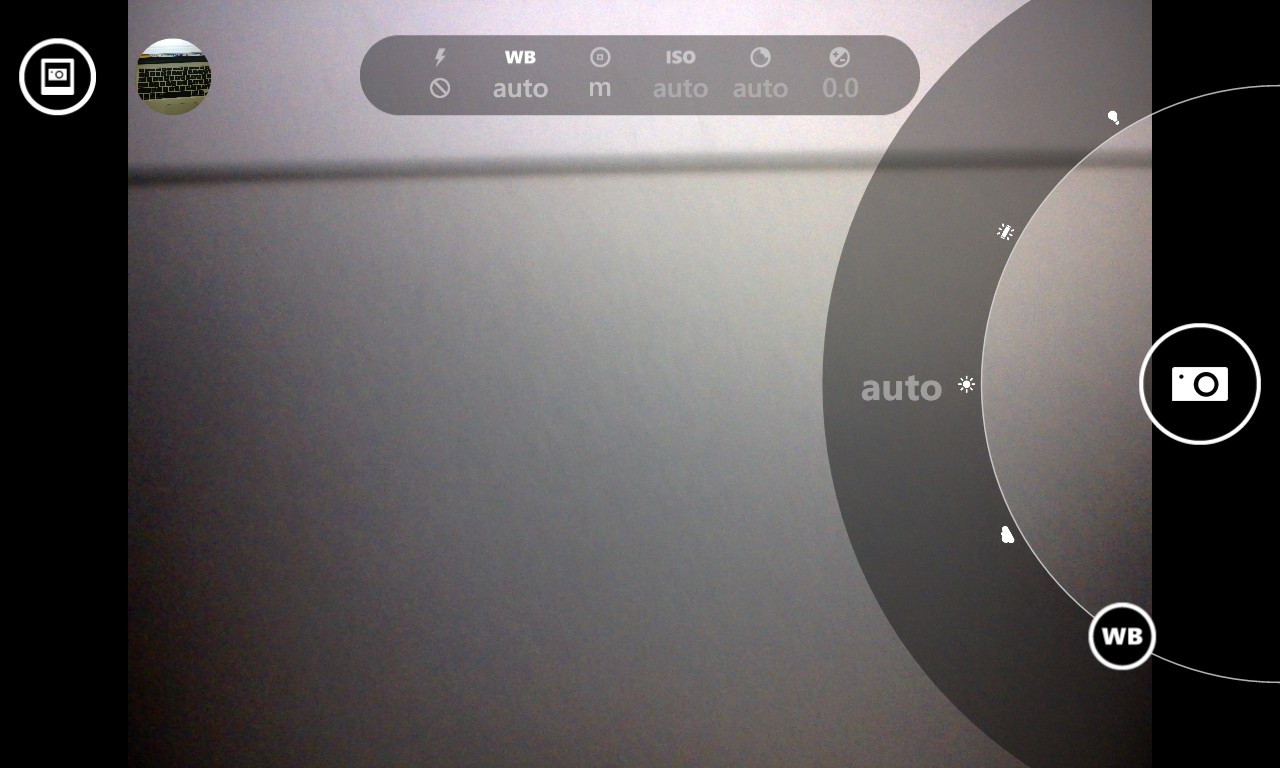
The next options lined up for control reveal an entirely new way of interacting with the parameters provided. Each option opens up a “ring” slider that lets you manually change the parameter with pre-set options. It’s probably the easiest way of controlling a smartphone camera, and gone are the usually flat sliders that have plagued the camera UIs for a long time. The Arc like slider is not only easier to control, but provides perfect reach for one-handed usage even in portrait.
Each option opens up its own slider, so lets take a look at each of them. First one is to control and set the White balance of the image with four pre-set values including Cloudy, Daylight, Flourescent and Tungsten. Of course, if needed, you can set it to Auto which is the default option.
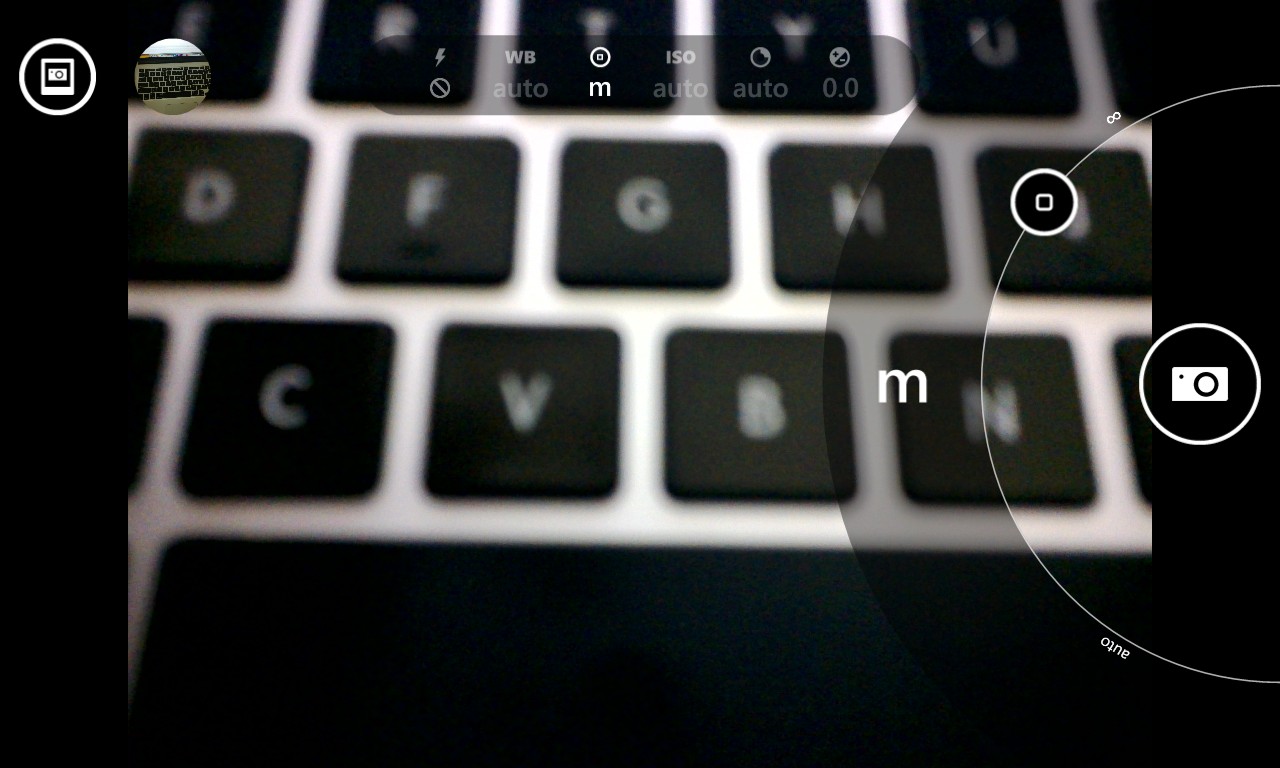
Next is one of the most interesting manual controls, and that is of the focus. Yes, one can finally control the focus on a Smartphone. While this has been possible on other third party apps like Pro Shot, it was never as easy as the one on the Pro Cam. The slider, which is initially set on Auto, can go from macro to infinity, providing complete creative control over focus. The infinity mode is somewhat different as it tries to gain a depth of field that is far wider than the maximum focus that the manual slider accommodates. This is also called the Hyperfocal mode that was introduced with the Nokia N8. Thankfully Manual Focus works for video too!
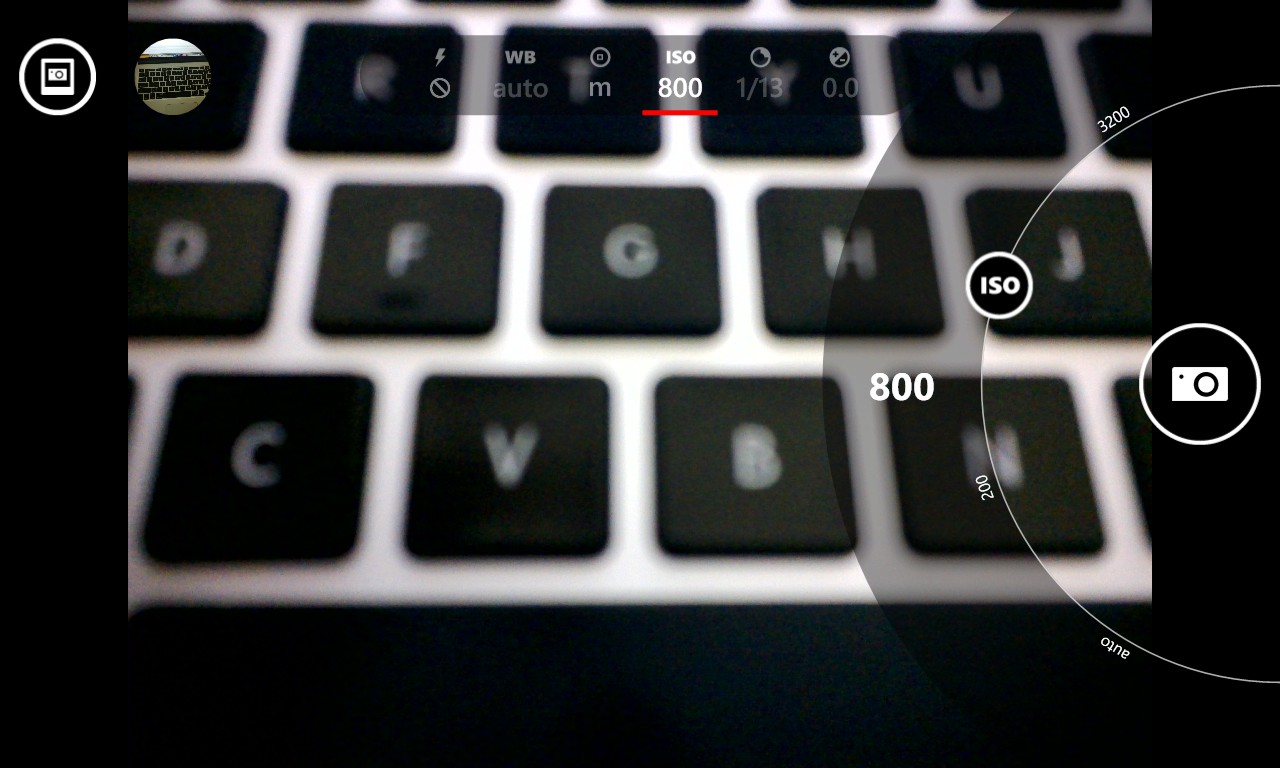
Next to manual focus is the ISO slider which lets you set the ISO manually up to 3200. Interestingly, if it is set to AUTO and you change other settings manually, the UI indicates the present number and underlines it with red if the exposure is too high, or low. Pretty nice, especially when there is no histogram.
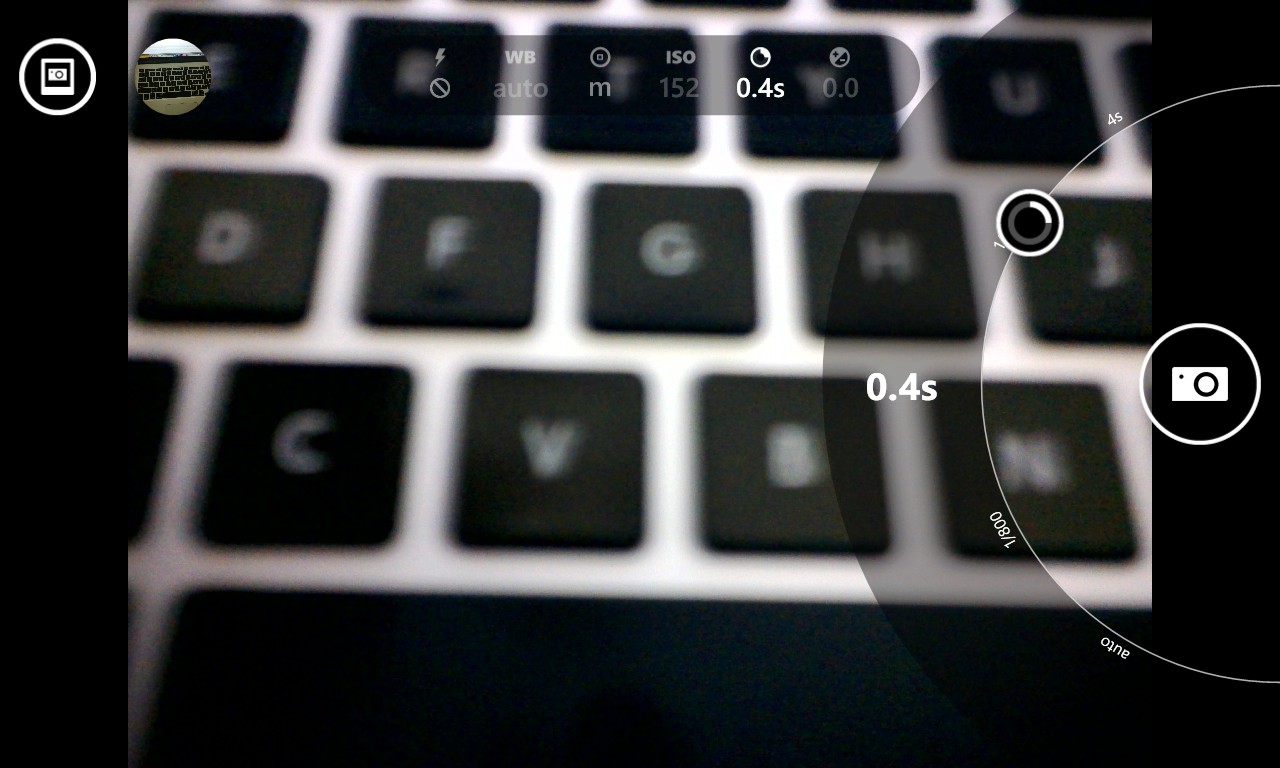
Next to the ISO, is shutter speed. Yet another interesting creative control that truly gives pro users what they need. One can go from 1/16000 to 4s as exposure time using the slider control. Again, this will affect the other parameters and the red underline indication tells you whether you have set the right setting or not. Going up to 4 seconds gives you the opportunity to take long exposure photographs with light trails and other types of motion blur. But it also allows you to take bright pics in really low light conditions, which is what we did with the picture here(you can check the EXIF data by downloading the full resolution image) –

Notice how the picture is sharp and clean, thanks to no ISO boosting and a longer shutter speed. Moving on, the final control after manual shutter speed is the exposure compensation.

This control lets you compensate for the exposure because of the fixed aperture nature of the lens. Sometimes, setting a slower shutter speed might whitewash the photo, but you can marginally reduce it by compensating with this control. The slider goes from -3 EV to +3 EV, and has indications in red underlines, if you are doing something wrong.
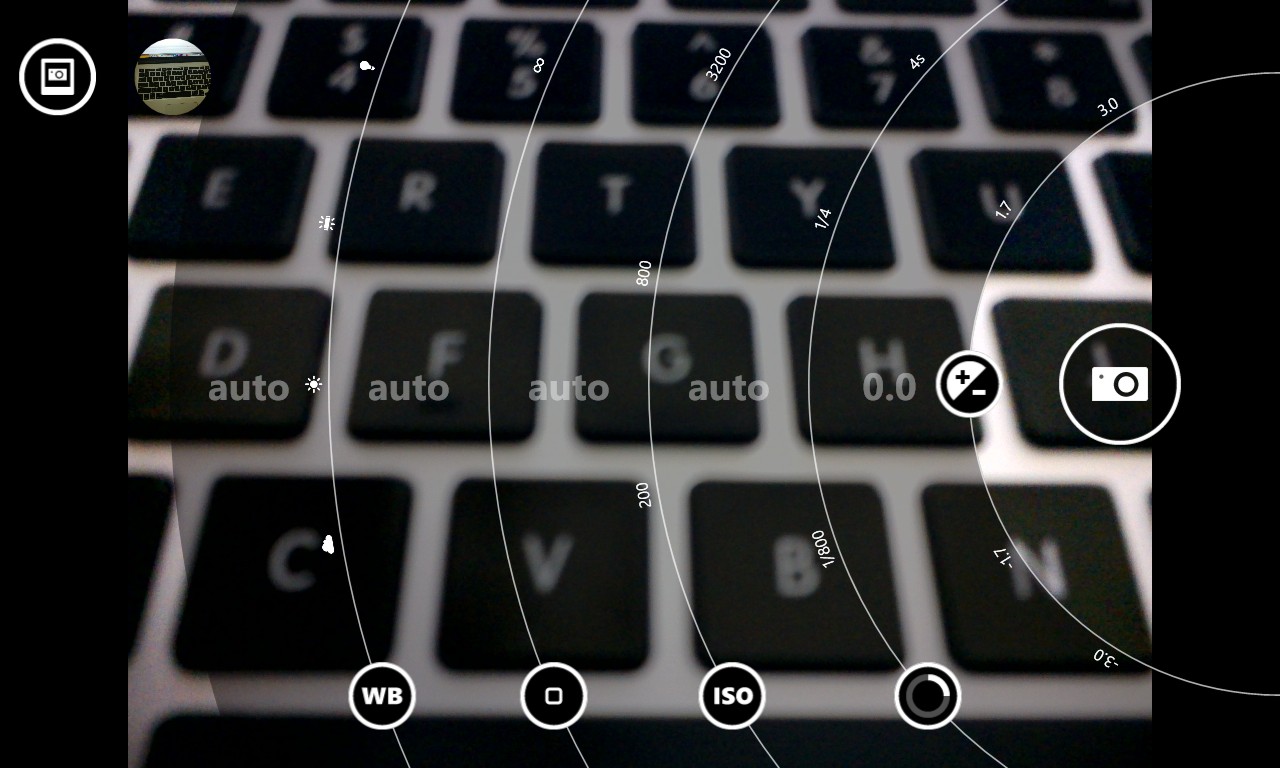
All these controls have been separate till now, but you can also access them all at once by swiping the shutter button to the left. This reveals all the controls, and one more swipe to the left resets the controls to the default AUTO settings. Swiping to the right takes you back to the barebones viewfinder of the camera. While we appreciate the options to reset all the settings, Nokia could have provided us an option to save specific settings, like the ones on the Nokia 808 PureView. Would have been much better, but since the controls are now super easy to access, just from a swipe, we can’t really complain much.
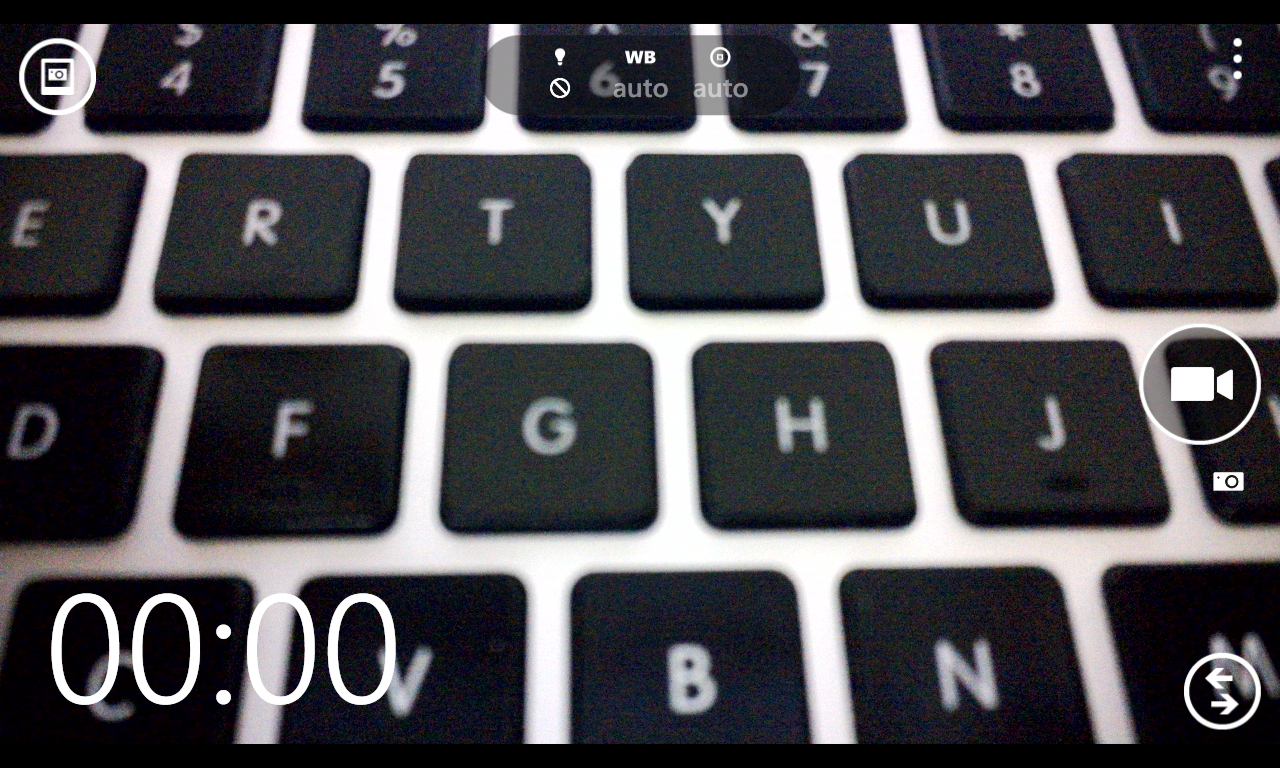
It’s also worth noting that all these controls work only on the stills mode, and are cut down on the video mode. The Video mode has manual controls only for white balance, focus and video light. Of course, we can’t really expect shutter speed options, but ISO and Exposure compensation with an option to lock the exposure would have been better. That said, here is a 1080p video sample we shot on manual focus using the lossless 1.8X zoom on the Lumia 925.
httpv://www.youtube.com/watch?v=wBQdHtOwHVM
Moving on to the all-important app bar, you have options for using the front camera, setting instant review of the photo on or off, using a limited time shutter delay for a steadier photo and a really nice tutorial for all the important features and the UI of the camera.

We recommend you go through it once for getting to know all the great features of Pro Cam. Also amongst the app bar items is the Bracketing mode, which can take photos in three or five different exposures, with three preset options for exposure compensated values.
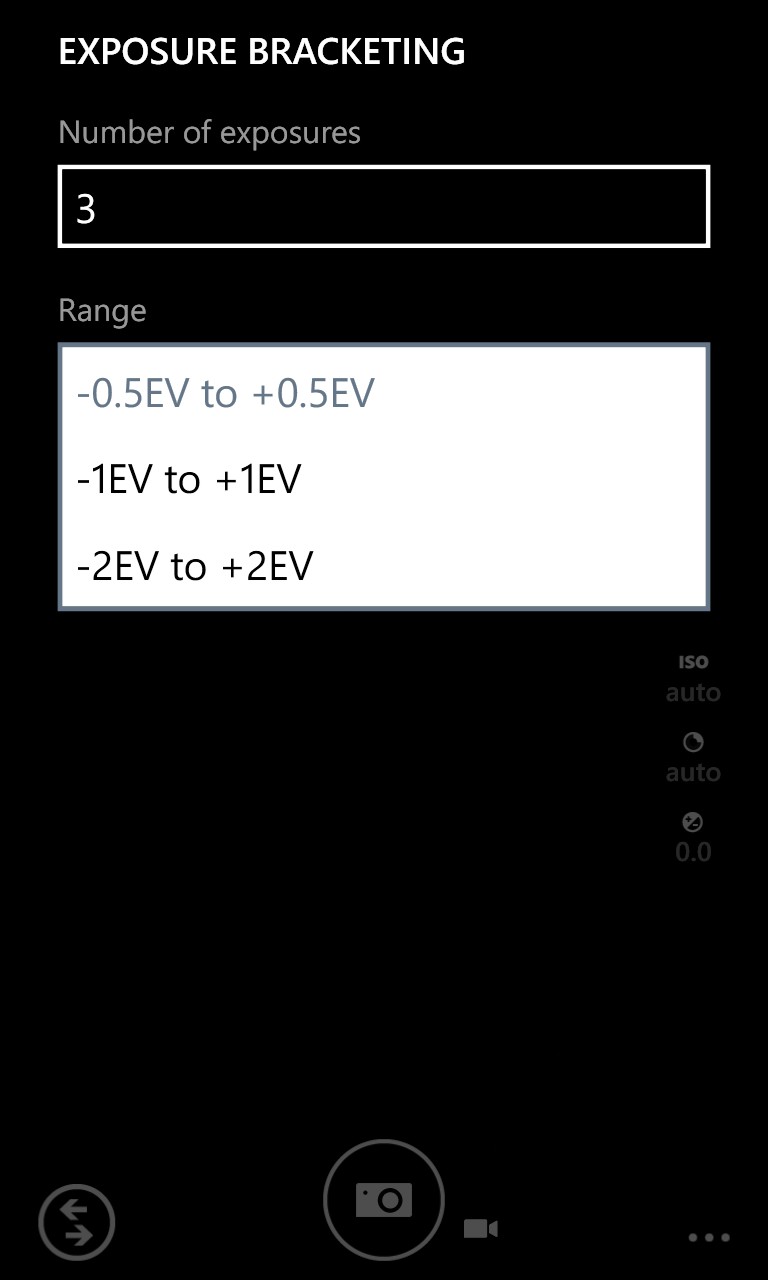
The photos are taken consecutively and are presumably for manual HDR processing later, as the app doesn’t provide any fusing options.
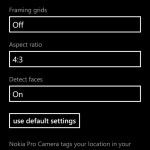
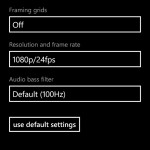

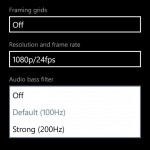
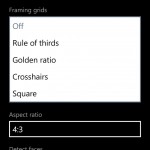
Going deeply into the settings reveals two pages, each for stills and video. Both stills and video have options to use framing grids like the Rule of Thirds, Golden Ratio and Square. Picture settings additionally have Aspect Ratio and Face detection options, which are pretty normal, while Video lets you change the resolution and the frame rate with a variety of options. You now have the ability to take videos at 24fps in both resolutions, which is quite nice because there were no options like these earlier. Also added to the video settings is the ability to control frequencies for the Rich Recording Audio Bass filter. A strong setting is more tolerant to bass than the default 100 Hz setting.
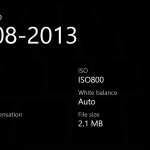

Everything aside, the Pro Camera app has improved options even for already taken pictures. Clicking on the round thumbnail on the extreme top left takes you the last taken picture with options to view EXIF data, quickly crop and resize a photo and delete it if necessary. The crop and resize feature is especially nice, with various preset crop options and quick rotate button, making it nice for re-framing, but the advantages of an oversampled picture are lost here, because that’s possible only with the Lumia 1020.
…and that concludes the walk through of the all new Pro Cam app for the Nokia Lumia 925. The Amber update on the Lumia 920, 925 and the 928 has enabled a really worthy camera experience matching up to the hardware of the respective devices. We really hope Nokia expands upon the functionality with new updates to the app, and irons out a few kinks at the same time. Meanwhile, check out our in-depth Smart Camera and Cinemagraph demo on the Lumia 925 that we did earlier. More to come tomorrow, stay tuned!