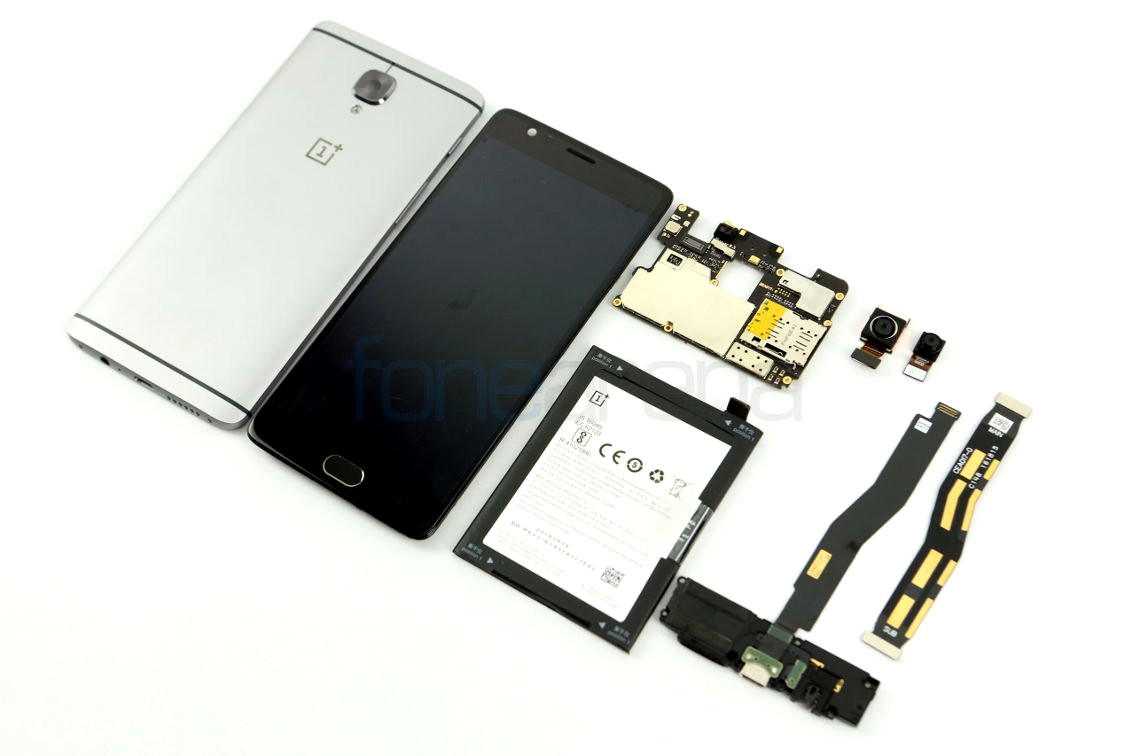
The OnePlus 3 is the latest flagship from OnePlus and it packs quite a lot of high-end features and specifications under its all new metal unibody design. However, there are a lot of components that go into making the device what it I that might not be revealed on a regular specs sheet. We did a teardown of the device to see what it packs on the inside. Let’s take a peek.
The specifications of the OnePlus 3 are:
- 5.5-inch (1920×1080 pixels) Full HD Optic AMOLED display with 2.5D curved Corning Gorilla Glass 4 protection
- 2.15GHz Quad-Core Snapdragon 820 64-bit processor with Adreno 530 GPU
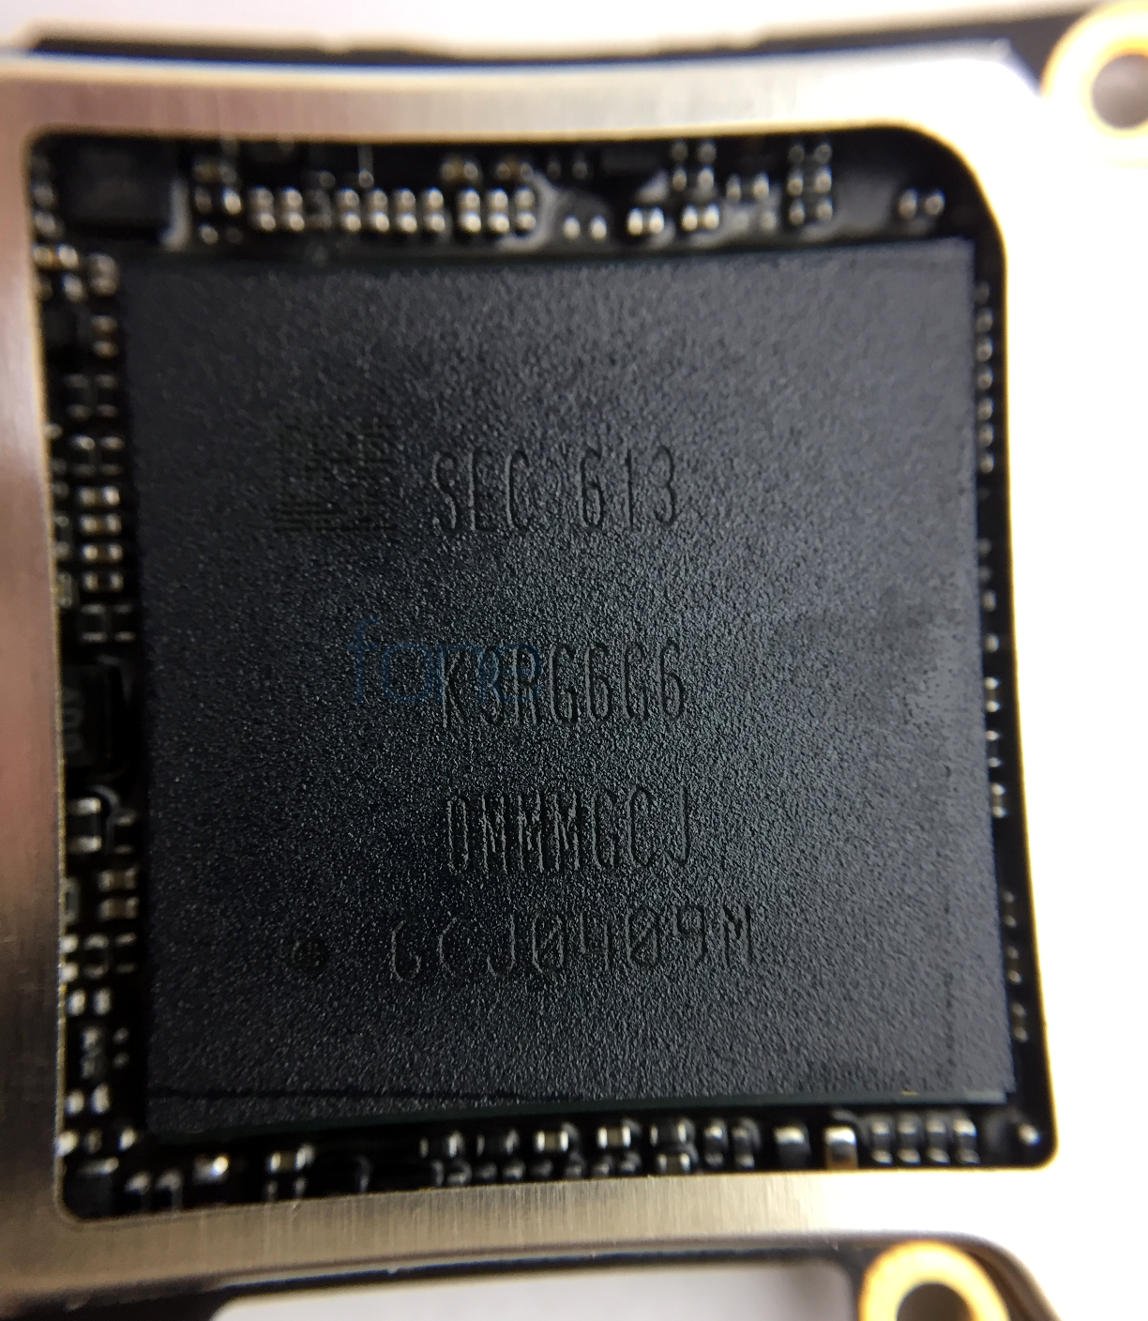
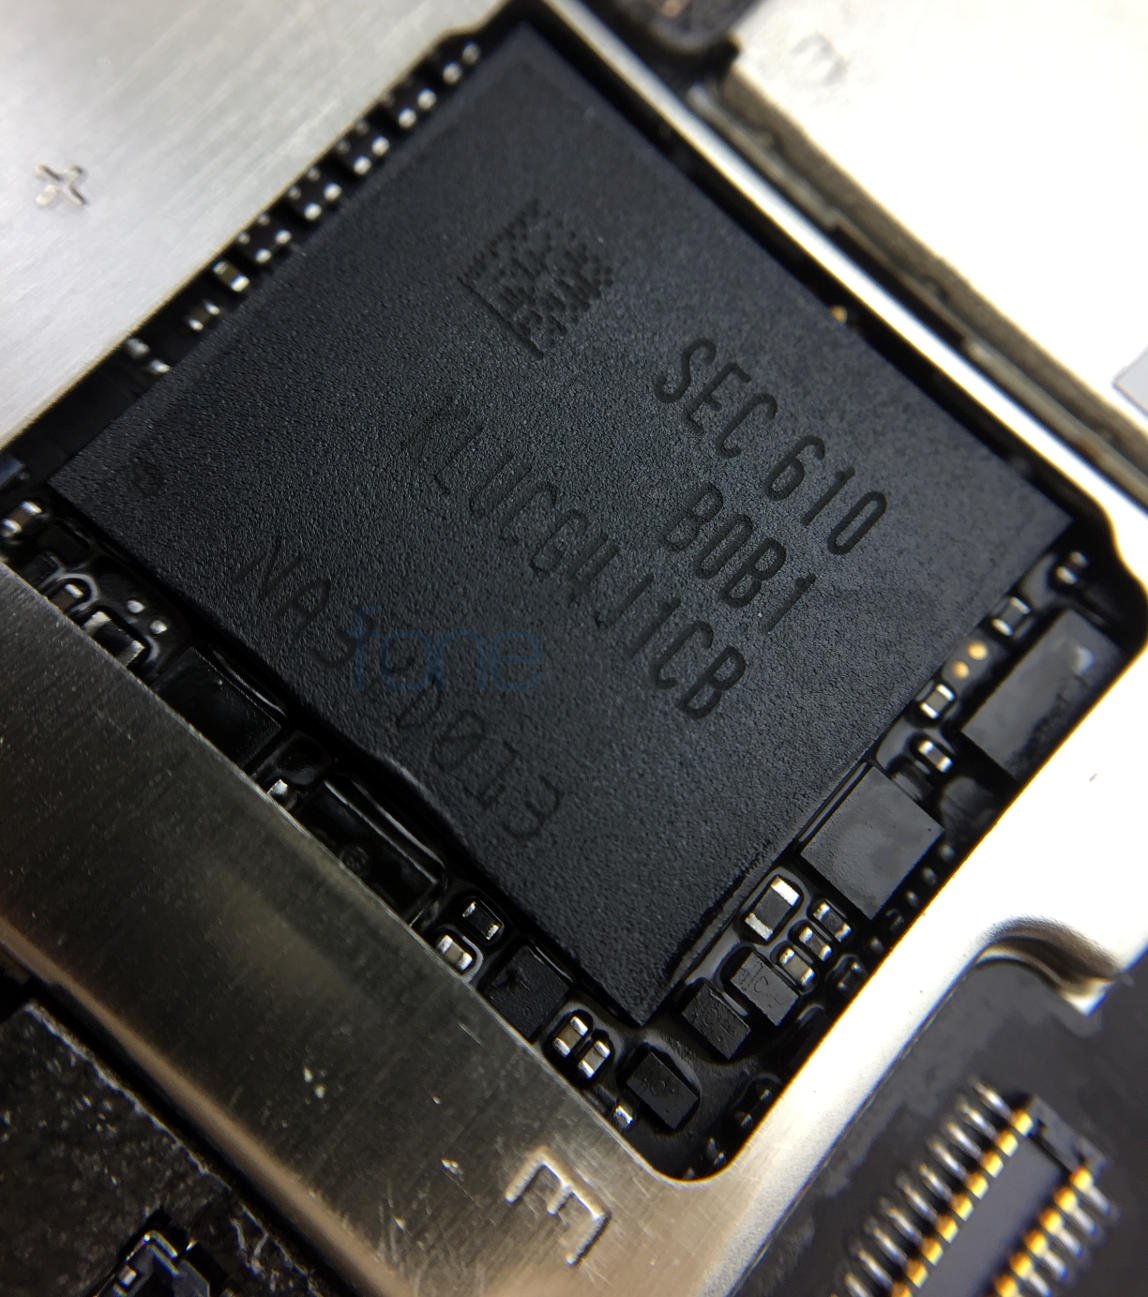
- 6GB LPDDR4 RAM with 64GB (UFS 2.0) storage
- Android 6.0.1 (Marshmallow) with Oxygen OS 3.1
- Dual nano SIM slots
- 16-megapixel rear camera with LED flash, Sony IMX298 sensor, 1.12 micron pixel size, f/2.0 aperture, PDAF, OIS, 4K video recording at 30 fps, 720p slow motion at 120fps
- 8MP front-facing camera with Sony IMX179 sensor, 1.4 micron pixel size, f/2.0 aperture, 1080p video recording
- Dimensions: 152.7×74.7×7.35mm; Weight: 158g
- Fingerprint sensor
- Bottom-facing speaker, dual microphone for noise cancellation
- 4G LTE with VoLTE, WiFi 802.11ac dual-band (MIMO), Bluetooth 4.2, GPS + GLONASS, NFC, USB Type-C
- 3000mAh battery with Dash Charge
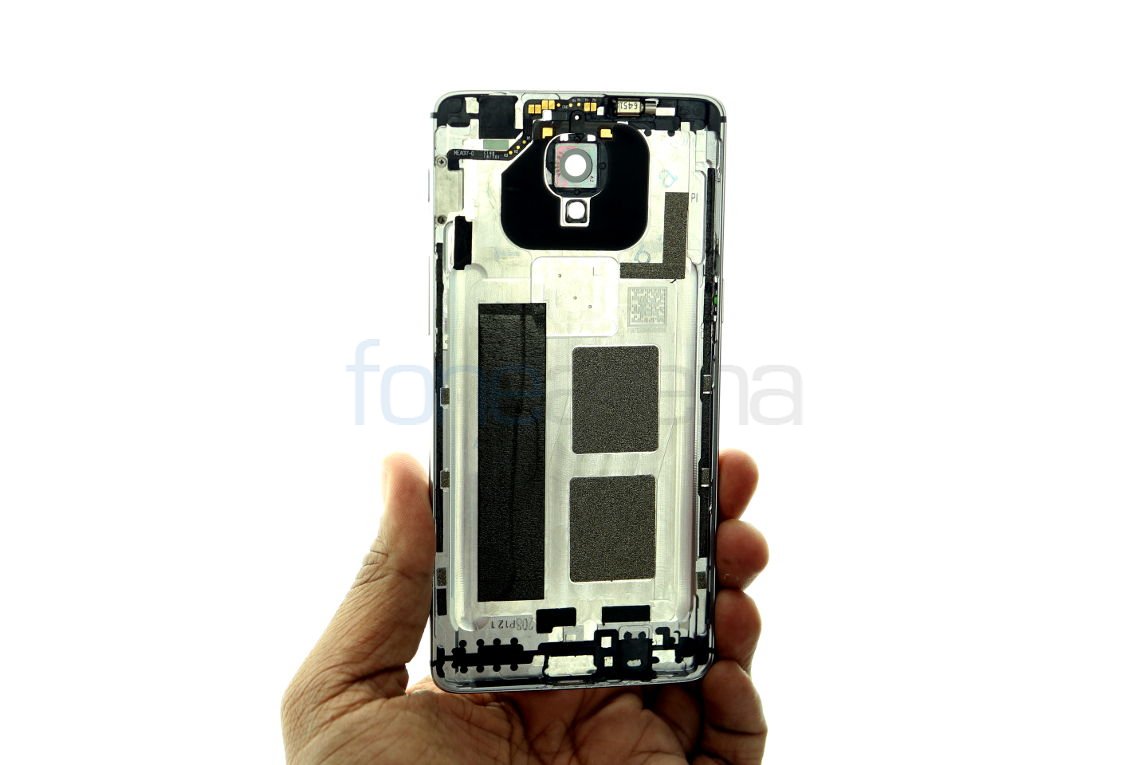
We started off from the bottom where there are two main screws that need to be removed in order to removed the back cover. Once the screws are taken out, we can pry open the back cover using tools. The back cover has been machined out of a single block of solid aluminium just as advertised. There are no separate bottom or top parts like on some other smartphones.
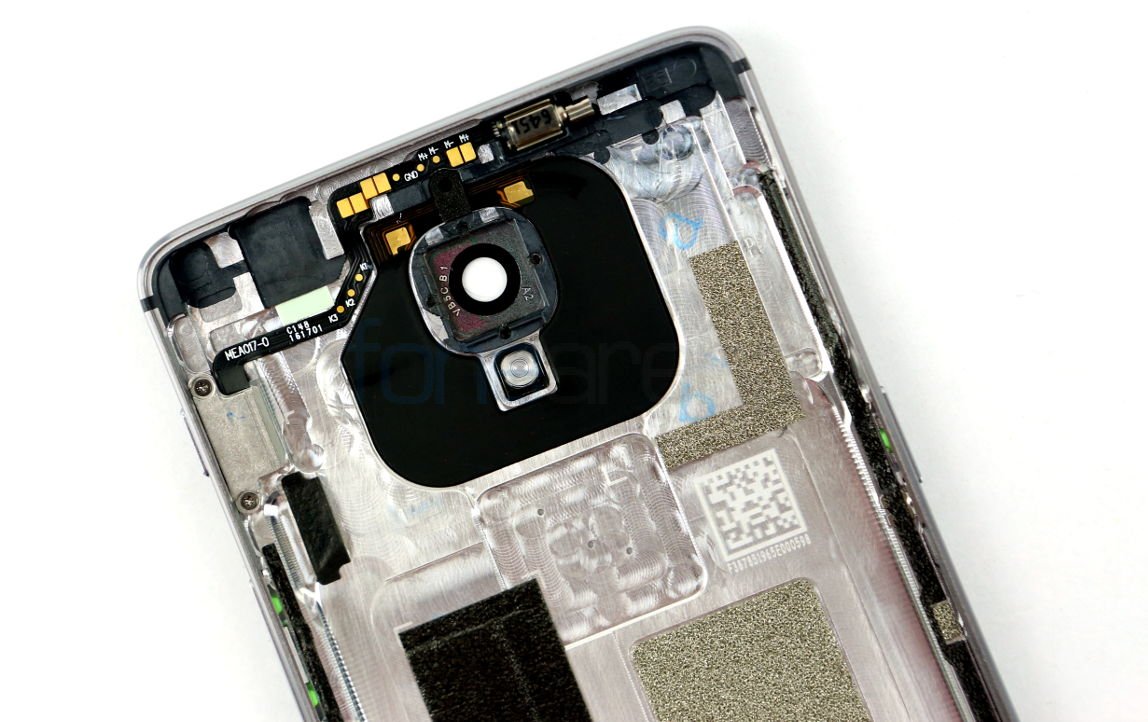
The back cover houses the vibration motor as well as the connectors that facilitate for the antenna reception. The bottom part of the back cover has the laser drilled holes for the speaker, microphone and USb Type-C port.
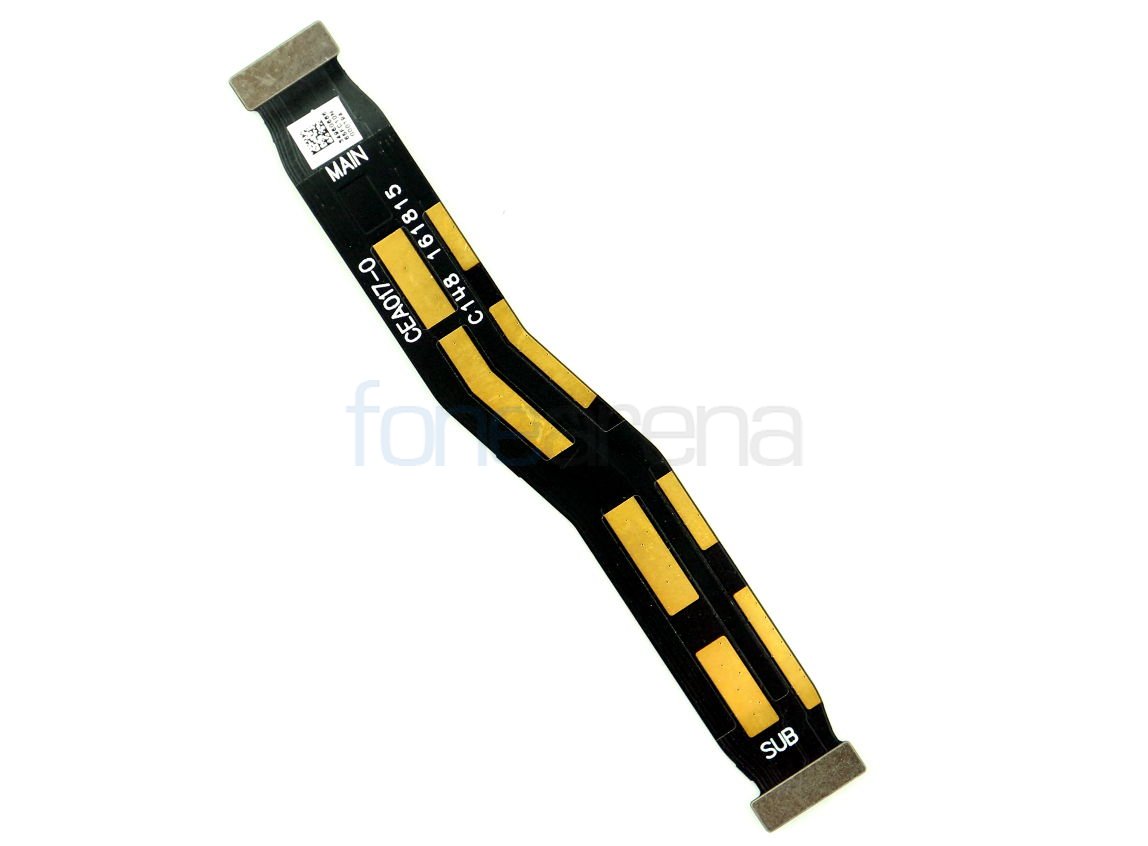
The next step is to remove the metal shielding that holds the ribbon cables in place. The ribbon cables connect the USB Type-C port, microphone and speaker units to the motherboard.
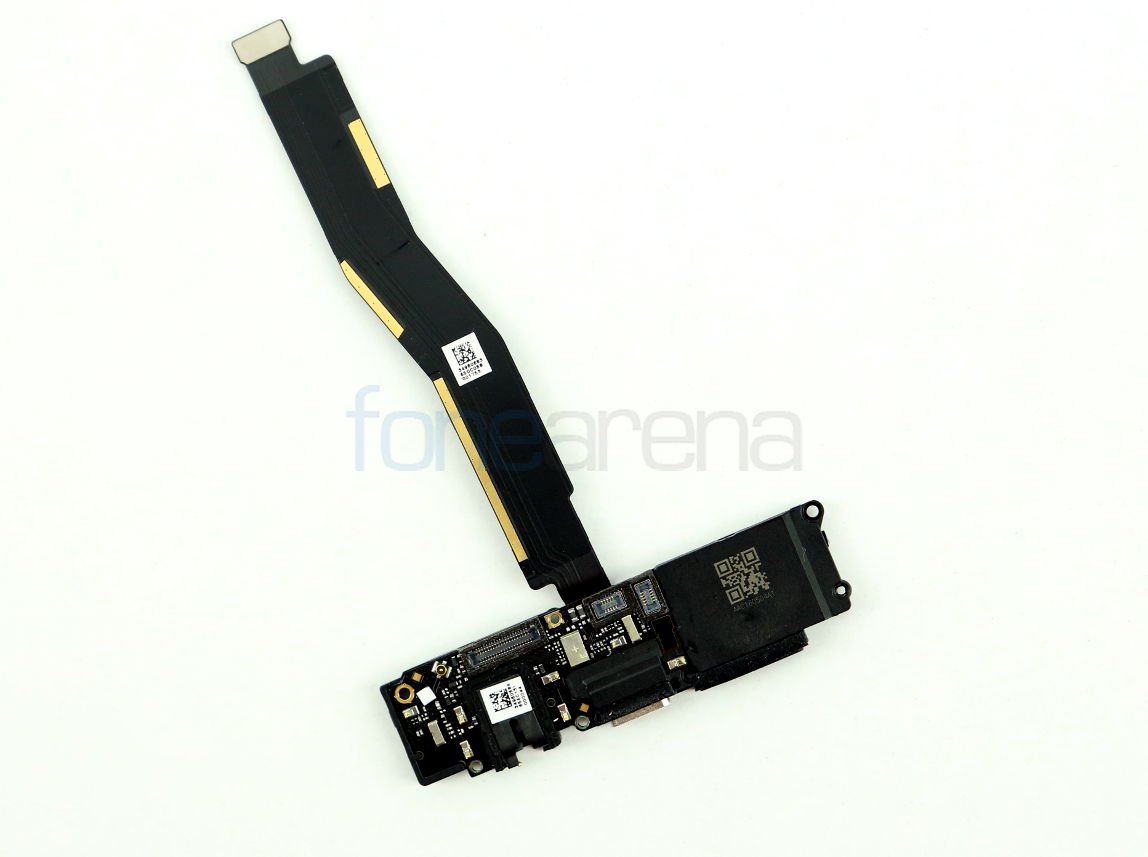
Then we separate the USB assembly which is held in place by seven screws. There are two ribbon connectors with the screws too and they connect the fingerprint sensor to the USB assembly. After undoing all the screws, you will be able to remove the USB assembly.
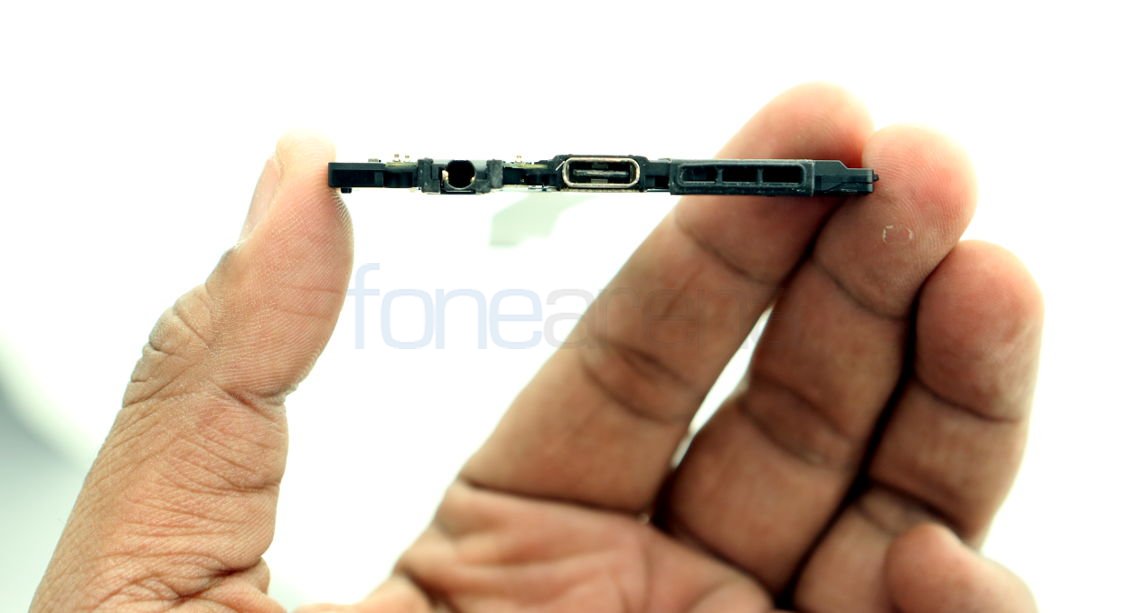
Below the assembly there is a ceramic fingerprint sensor and corresponding ribbon connectors. The USB assembly itself consists of the USB Type-C port with Dash Charge technology, the 3.5mm audio jack and speaker. The speaker unit has ample room to facilitate a loud audio output.
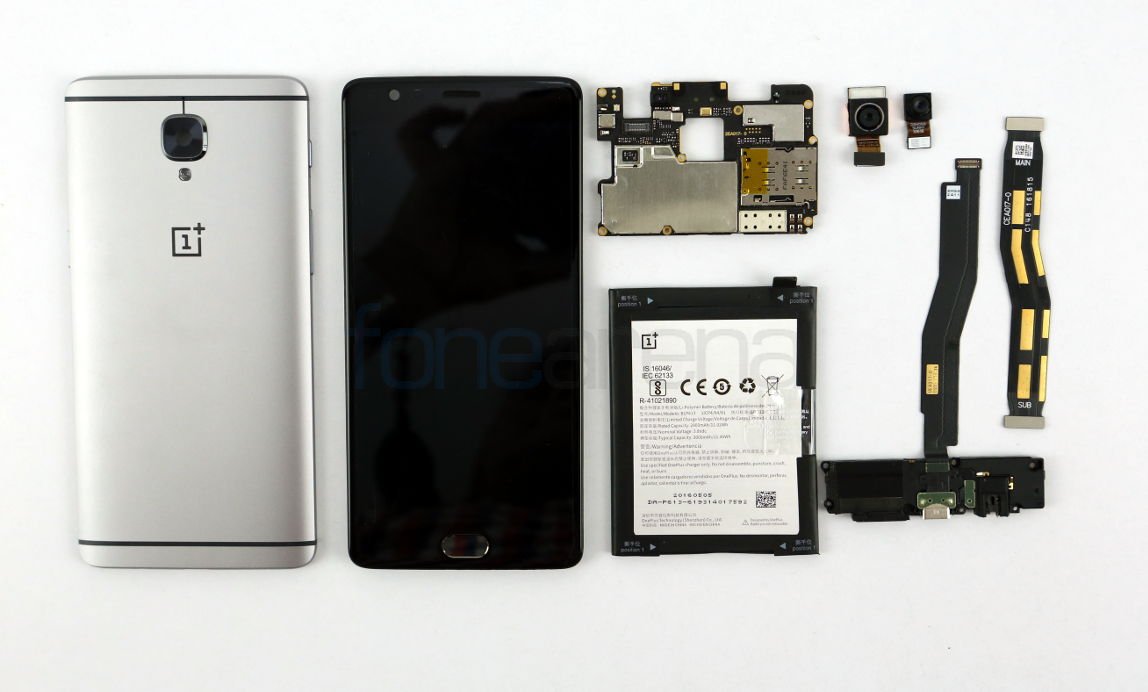
Next, we disconnect the 3000mAh battery which can be done by pulling the sticker that is placed over it. The motherboard is held in place by 7 screws as well and a ribbon cable which connects to the display. After removing them, the motherboard comes loose.

We then remove the front facing and rear cameras. The front facing camera is an 8 Megapixel Sony IMX 179 sensor while the rear one is a 16 Megapixel Sony IMX 298 sensor. The rear module is a bit thick due to the OIS (Optical Image Stabilization).
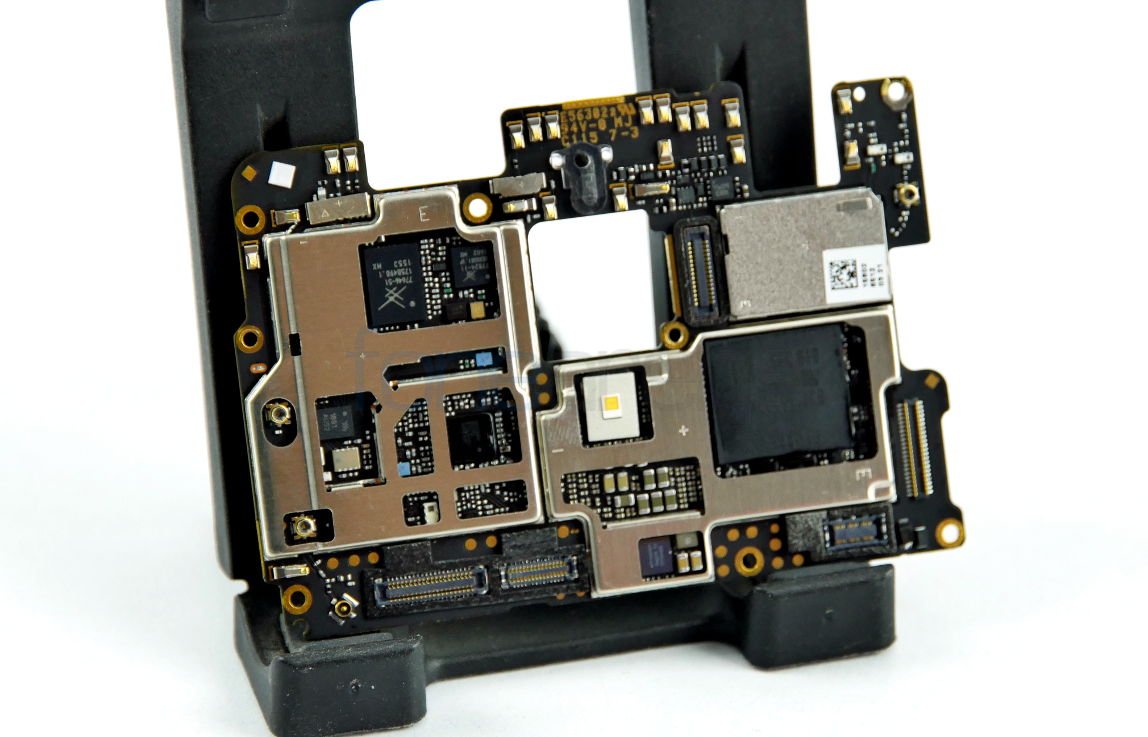
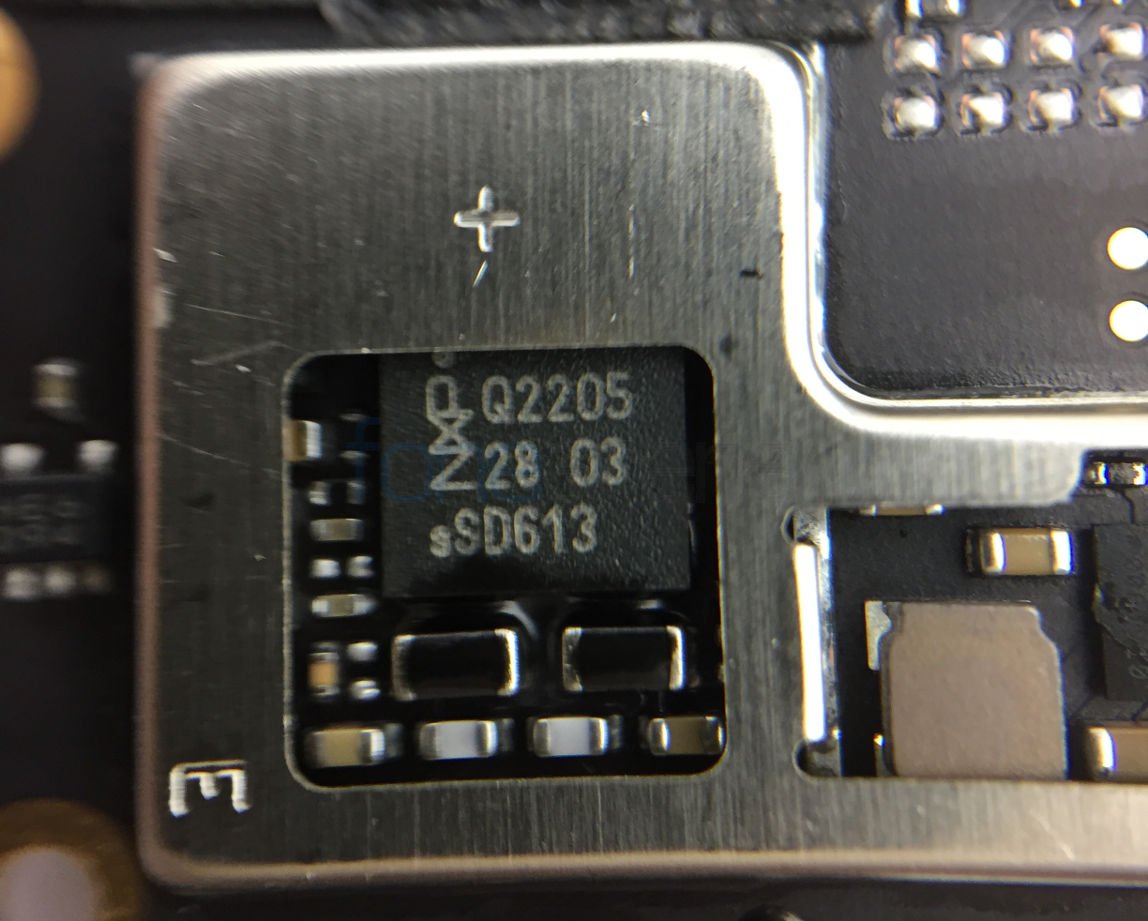
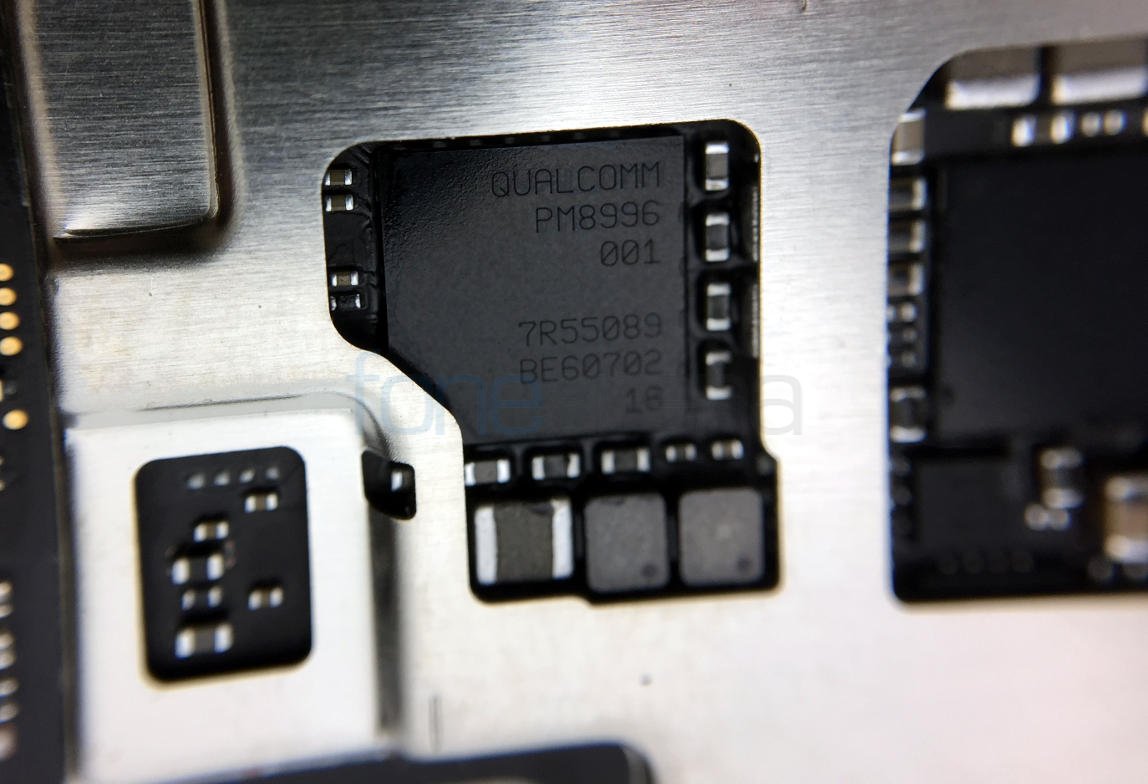
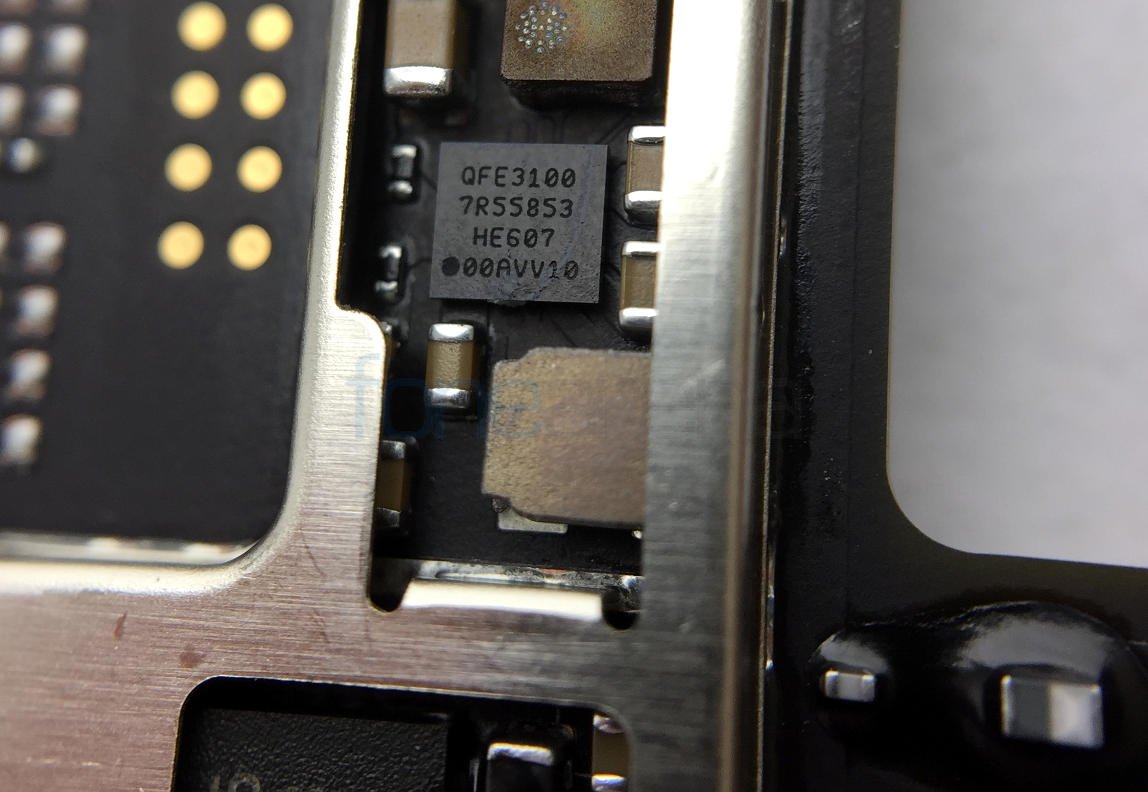
On the front of the logic board there is a proximity sensor and ambient light sensor. There is also NXP audio amplifier, 6GB Samsung LPDDR4 RAM, Qualcomm PM8996 power management IC, Qualcomm RF360 envelope tracker and dual nano SIM slots.

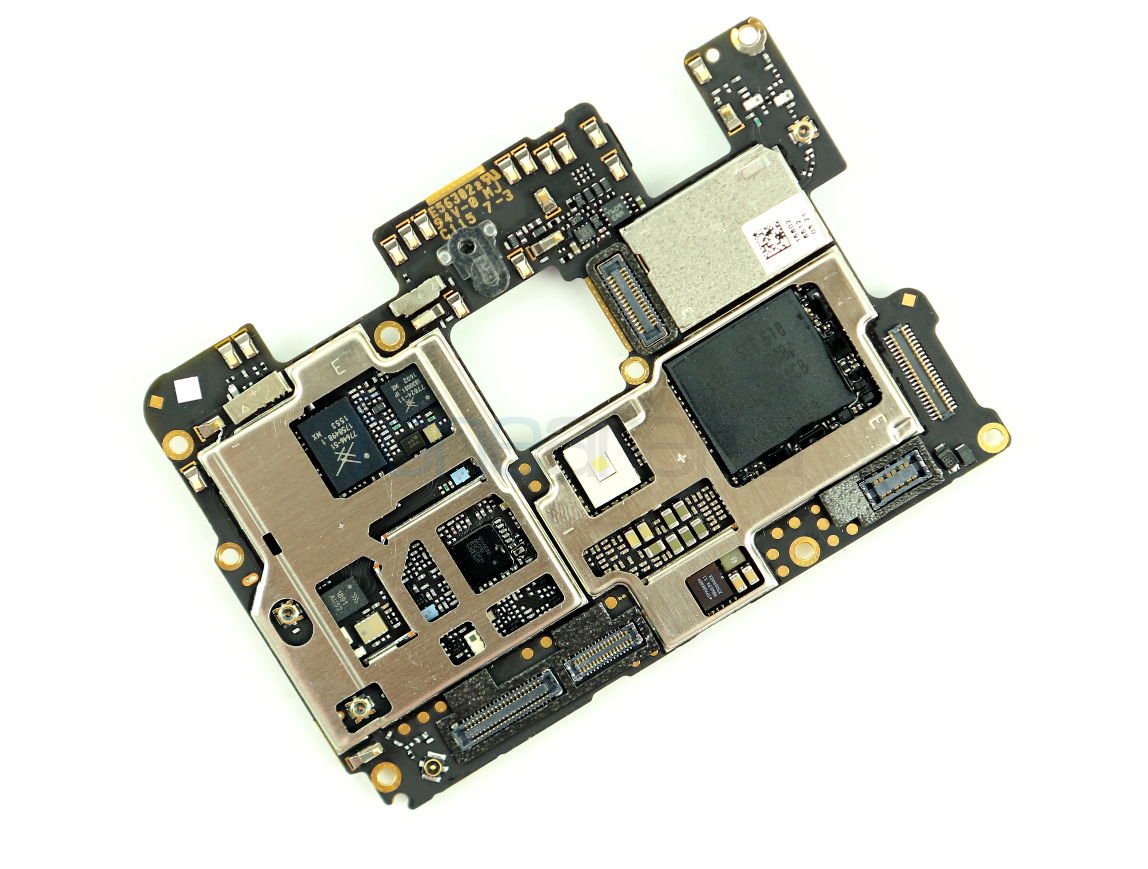
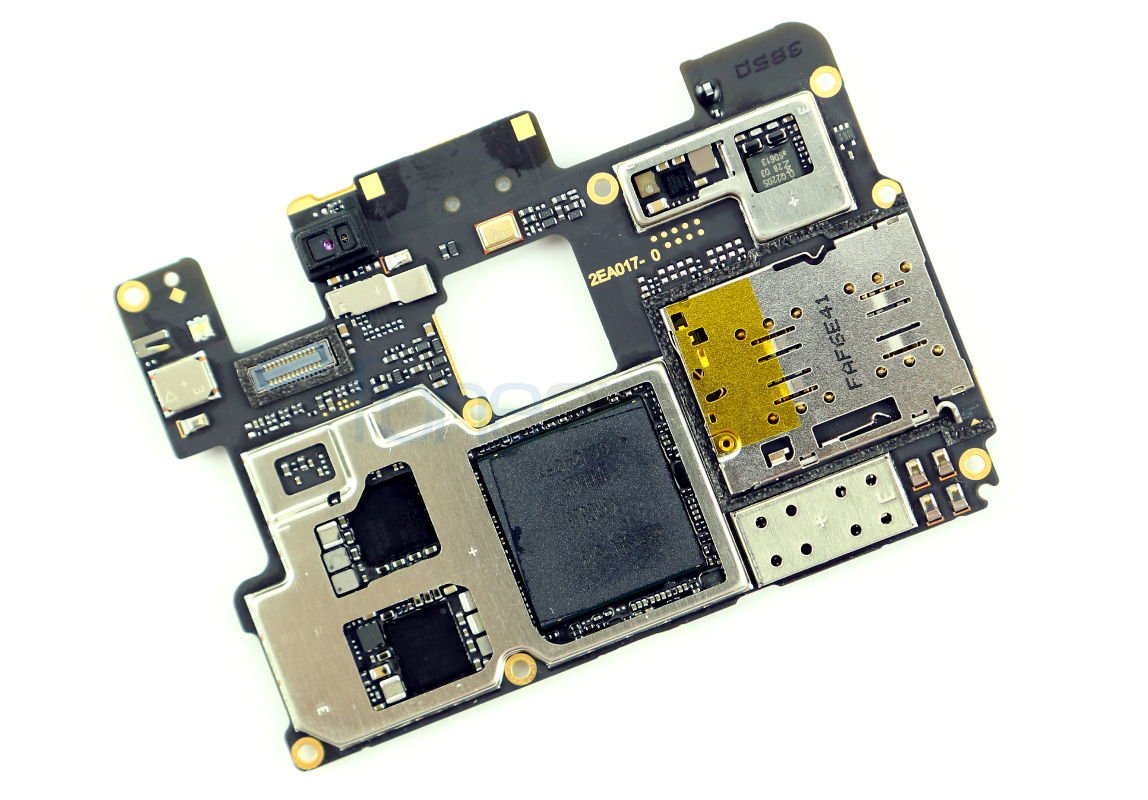
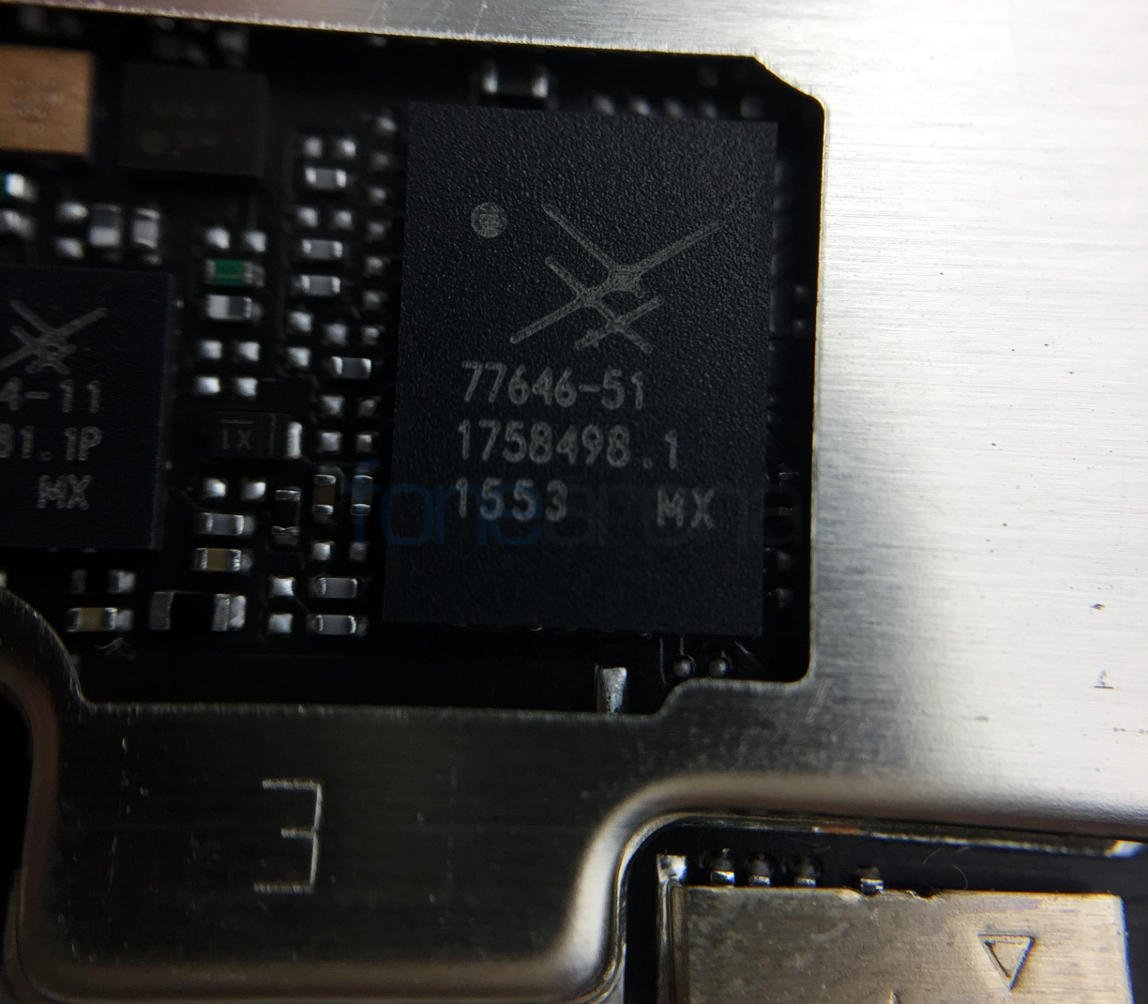
The back side of the logic board houses the single LED flash, Qualcomm transceiver WTR3925, 64GB Samsung UFS 2.0 storage and Skyworks 77824-11 Power Amplifier. The display houses the fingerprint sensor and internal speaker.

We give the OnePlus 3 a repairability score of 7.5/10. Although it is a bit difficult to remove the back cover as many would’ve guessed, it is fairly easy to replace the internals after that. Please note that teardowns will most definitely void your warranty so if you are planning to do the same on your device, keep that in mind.
Srivatsan contributed to this post. Images by Siraj